Getting Started with Spring Content
What you'll build
You'll build an application that uses Spring Content to build a simple web-based document list.
What you'll need
-
About 30 minutes
-
A favorite text editor or IDE
-
JDK 1.8 or later
-
Maven 3.0+
You can also import the code from this guide as well as view the web page directly into Spring Tool Suite (STS) and work your way through it from there.
How to complete this guide
Like most Spring Getting Started guides, you can start form scratch and complete each step, or you can bypass basic setup steps that are already familiar to you. Either way, you end up with working code.
To start from scratch, move on to Build with Maven.
To skip the basics, do the following:
-
Download and unzip the source repository for this guide, or clone it using Git:
git clone https://github.com/paulcwarren/spring-content-gettingstarted.git -
cdintospring-content-gettingstarted/spring-content-fs/initial -
Jump ahead to
Define a simple entity. When you’re finished, you can check your results against the code inspring-content-gettingstarted/spring-content-fs/complete.
Build with Maven
First you set up a basic build script. You can use any build system you like when building apps with Spring, but the code you need to work with Maven is included here. If you’re not familiar with Maven, refer to Building Java Projects with Maven.
Create a directory structure
In a project directory of your choosing, create the following subdirectory structure; for example, with mkdir -p src/main/java/gettingstarted on *nix systems:
∟ src
   ∟ main
       ∟ java
           ∟ gettingstarted
       ∟ resources
           ∟ static
pom.xml
<?xml version="1.0" encoding="UTF-8"?>

	<modelVersion>4.0.0</modelVersion>

	<artifactId>spring-content-with-fs</artifactId>
	<packaging>jar</packaging>

 	<parent>
		<groupId>com.github.paulcwarren</groupId>
		<artifactId>gettingstarted-spring-content</artifactId>
		<version>0.0.1-SNAPSHOT</version>
		<relativePath>../../pom.xml</relativePath>
	</parent>

	<dependencyManagement>
		<dependencies>
			<dependency>
				<groupId>org.springframework.boot</groupId>
				<artifactId>spring-boot-starter-parent</artifactId>
				<version>3.3.2</version>
				<type>pom</type>
				<scope>import</scope>
			</dependency>
		</dependencies>
	</dependencyManagement>

	<dependencies>
		<dependency>
			<groupId>org.springframework.boot</groupId>
			<artifactId>spring-boot-starter-web</artifactId>
		</dependency>
		<dependency>
			<groupId>org.springframework.boot</groupId>
			<artifactId>spring-boot-starter-data-jpa</artifactId>
		</dependency>
		<dependency>
			<groupId>com.h2database</groupId>
			<artifactId>h2</artifactId>
		</dependency>
		<dependency>
			<groupId>org.springframework.boot</groupId>
			<artifactId>spring-boot-starter-data-rest</artifactId>
		</dependency>
		<dependency>
			<groupId>com.github.paulcwarren</groupId>
			<artifactId>spring-content-fs-boot-starter</artifactId>
			<version>${spring.content.version}</version>
		</dependency>
		<dependency>
		  <groupId>org.projectlombok</groupId>
		  <artifactId>lombok</artifactId>
	    </dependency>

		<!-- Test dependencies -->
		<dependency>
			<groupId>org.springframework.boot</groupId>
			<artifactId>spring-boot-starter-test</artifactId>
			<scope>test</scope>
            <exclusions>
                <exclusion>
                    <groupId>org.junit.jupiter</groupId>
                    <artifactId>junit-jupiter-api</artifactId>
                </exclusion>
                <exclusion>
                    <groupId>org.junit.jupiter</groupId>
                    <artifactId>junit-jupiter-engine</artifactId>
                </exclusion>
            </exclusions>
		</dependency>
		<dependency>
			<groupId>io.rest-assured</groupId>
			<artifactId>spring-mock-mvc</artifactId>
			<scope>test</scope>
		</dependency>
		<dependency>
			<groupId>com.github.paulcwarren</groupId>
			<artifactId>ginkgo4j</artifactId>
			<version>${ginkgo.version}</version>
			<scope>test</scope>
		</dependency>
	</dependencies>

	<build>
		<plugins>
			<plugin>
				<groupId>org.springframework.boot</groupId>
				<artifactId>spring-boot-maven-plugin</artifactId>
			</plugin>
		</plugins>
	</build>

	<repositories>
		<repository>
			<id>snapshots</id>
			<name>nexus</name>
			<url>https://oss.sonatype.org/content/repositories/snapshots</url>
			<snapshots>
				<enabled>true</enabled>
			</snapshots>
		</repository>
	</repositories>

</project>
We add several dependencies:-
-
Spring Boot Starter Web provides the web server framework
-
Spring Boot Starter Data JPA will provide a relational database to store the metadata of our files. In this case we are using the H2 in-memory database
-
Spring Boot Starter Data REST will provide REST endpoints for our File metadata
-
Spring Boot Starter Content FS will provide a Filesystem-based store for the content of each file and manage the association with an Entity
Define a simple Entity
Let's define a simple Entity to represent a File.
src/main/java/gettingstarted/File.java
package gettingstarted;

import java.util.Date;

import jakarta.persistence.Entity;
import jakarta.persistence.GeneratedValue;
import jakarta.persistence.GenerationType;
import jakarta.persistence.Id;

import org.springframework.content.commons.annotations.ContentId;
import org.springframework.content.commons.annotations.ContentLength;

import lombok.Getter;
import lombok.NoArgsConstructor;
import lombok.Setter;

@Entity
@Getter
@Setter
@NoArgsConstructor
public class File {

	@Id
	@GeneratedValue(strategy = GenerationType.AUTO)
	private Long id;
	private String name;
	private Date created = new Date();
	private String summary;

	@ContentId private String contentId;
	@ContentLength private long contentLength;
	private String contentMimeType = "text/plain";
}
As you would expect we created a standard JPA Entity to capture some metadata about our file; name and summary. In addition, because we will be serving these files over the web, we also record mimeType so that we can instruct the browser correctly.
We then add two annotated Spring Content fields; @ContentId and @ContentLength. @ContentId allows us to associate a stream of binary data with an Entity and @ContentLength records the length of that stream. These will be automatically managed by Spring Content.
Create a File Repository
Next, as you would also expect, we create a CrudRepository for handling File entities and we export it as a @RepositoryRestResource so, for the cost of writing just one interface and annotating it, we get the ability to create, read, update and delete File entities using REST endpoints.
NB. For more information on Spring Data JPA and Spring Data REST see their respective spring.io getting started guides.
src/main/java/gettingstated/FileRepository.java
package gettingstarted;

import org.springframework.data.jpa.repository.JpaRepository;
import org.springframework.data.rest.core.annotation.RepositoryRestResource;

@RepositoryRestResource(path="files", collectionResourceRel="files")
public interface FileRepository extends JpaRepository<File, Long> {

}
Create a File Content Store
Similarly, we then create a ContentStore for handling content associated with the File entity.
src/main/java/gettngstarted/FileContentStore.java
package gettingstarted;

import org.springframework.content.commons.store.ContentStore;

public interface FileContentStore extends ContentStore<File, String> {
}
Let's investigate this interface:-
-
ContentStoreprovides several methods for handling content; setContent, getContent and unsetContent -
The dependency
com.github.paulcwarren:spring-content-fs-boot-starterprovides a Filesystem-based implementation of this interface and Spring Content auto-configuration ensures that this implementation will be used wherever theFileContentRepositoryis@Autowired.
However, unlike our FileRepository we haven't annotated this as a
StoreRestResource and therefore we don't automatically get REST
endpoints for handling content. This annotation does exist (and is the
topic of our next tutorial) but, for now,
we have to roll our own REST endpoints.
Create a File Controller
Let's create these endpoints with a simple Controller class.
src/main/java/gettingstarted/FileContentController.java
package gettingstarted;

import java.io.IOException;
import java.util.Optional;

import org.springframework.beans.factory.annotation.Autowired;
import org.springframework.core.io.InputStreamResource;
import org.springframework.http.HttpHeaders;
import org.springframework.http.HttpStatus;
import org.springframework.http.ResponseEntity;
import org.springframework.web.bind.annotation.PathVariable;
import org.springframework.web.bind.annotation.RequestMapping;
import org.springframework.web.bind.annotation.RequestMethod;
import org.springframework.web.bind.annotation.RequestParam;
import org.springframework.web.bind.annotation.RestController;
import org.springframework.web.multipart.MultipartFile;

@RestController
public class FileContentController {

	@Autowired private FileRepository filesRepo;
	@Autowired private FileContentStore contentStore;

	@RequestMapping(value="/files/{fileId}", method = RequestMethod.PUT)
	public ResponseEntity<?> setContent(@PathVariable("fileId") Long id, @RequestParam("file") MultipartFile file)
			throws IOException {

		Optional<File> f = filesRepo.findById(id);
		if (f.isPresent()) {
			f.get().setContentMimeType(file.getContentType());

			contentStore.setContent(f.get(), file.getInputStream());

			// save updated content-related info
			filesRepo.save(f.get());

			return new ResponseEntity<Object>(HttpStatus.OK);
		}
		return null;
	}

	@RequestMapping(value="/files/{fileId}", method = RequestMethod.GET)
	public ResponseEntity<?> getContent(@PathVariable("fileId") Long id) {

		Optional<File> f = filesRepo.findById(id);
		if (f.isPresent()) {
			InputStreamResource inputStreamResource = new InputStreamResource(contentStore.getContent(f.get()));
			HttpHeaders headers = new HttpHeaders();
			headers.setContentLength(f.get().getContentLength());
			headers.set("Content-Type", f.get().getContentMimeType());
			return new ResponseEntity<Object>(inputStreamResource, headers, HttpStatus.OK);
		}
		return null;
	}
}
Let's explain this class.
-
It's a standard Spring Controller with two request mapped methods, one for setting content and the other for getting content.
-
Both
setContentandgetContentmethods inject themselves into the URI space of theFileRepository, namely/files/{fileId}, but handle all GETs and PUTs that are aplication/hal+json based; i.e. content. -
We inject our
FileRepositoryand ourFileContentStore. Respectively, Spring Boot will ensure real implementations are injected (based on what Spring Data and Spring Content modules are found on the class path). -
setContentuses theFileRepositoryto fetch the File entity using the givenfileIdand then uses theFileContentStoreto save the given file input stream. -
Similarly,
getContentuses theFileRepositoryto fetch the File entity using the givenfileIdand again use theFileContentStoreto fetch the associated content and stream it back to the client as the response. We also use previosuly saved metdatacontentLengthandmimeTypeto set http headers appropriately. This will mean that browsers can handle the content correctly by launching the relevant desktop application.
Create Web Client
Now let's create a really simple angular web front-end for our document list.
src/main/resources/static/index.html
<!doctype html>
<html ng-app="filesApp">
  <head>
    <script src="https://ajax.googleapis.com/ajax/libs/angularjs/1.5.8/angular.min.js"></script>
    <script src="files.js"></script>
  </head>
  <body>
    <div ng-controller="FilesListController as filesList">
	    <h1>Files</h1>

	    <section style="display: table; width: 80%">
		  <header style="display: table-row;">
		    <div style="display: table-cell;">Name</div>
		    <div style="display: table-cell;">Length</div>
		    <div style="display: table-cell;">Created</div>
		    <div style="display: table-cell;">Summary</div>
		  </header>
		  <div style="display: table-row;" ng-repeat="file in filesList.files">
		    <div style="display: table-cell;"><a href="{{filesList.getHref(file)}}" type={{file.mimeType}} download={{file.name}}>{{file.name}}</a></div>
		    <div style="display: table-cell;"><label>{{file.contentLength}}</label></div>
		    <div style="display: table-cell;"><label>{{file.created}}</label></div>
		    <div style="display: table-cell;"><label>{{file.summary}}</label></div>
		  </div>
		</section>

	    <h2>New File</h2>
	    <input type="file" id="file" name="file"/>
	    <input type="summary" id="summary" name="summary" ng-model="filesList.summary" placeholder="Summary"/>
		<button ng-click="filesList.upload()">Upload</button>
    </div>
  </body>
</html>
This HTML presents a simple list of files using an ng-repeat directive and contains a simple form allowing new files to be uploaded.
All the interesting code is in the code-behind file so add the following code behind to src/main/resources/static/files.js
angular.module('filesApp', [])
  .controller('FilesListController', function($http) {
    var filesList = this;
    filesList.files = [];

    filesList.getFilesList = function() {
        $http.get('/files/').
            success(function(data, status, headers, config) {
                if (data._embedded != undefined) {
        			filesList.files = [];
                    angular.forEach(data._embedded.files, function(file) {
                        filesList.files.push(file);
	                });
	            }
	        });
	    };
    filesList.getFilesList();

    filesList.getHref = function(file) {
    	return file._links["self"].href
    };

    filesList.upload = function() {
    	var f = document.getElementById('file').files[0];
    	var file = {name: f.name, summary: filesList.summary};

    	$http.post('/files/', file).
    		then(function(response) {
	    		var fd = new FormData();
	            fd.append('file', f);
	            return $http.put(response.headers("Location"), fd, {
	                transformRequest: angular.identity,
	                headers: {'Content-Type': undefined}
	            });
	        })
	        .then(function(response) {
    			filesList.title = "";
    			filesList.keywords = "";
    			filesList.getFilesList();
    			document.getElementById('file').files[0] = undefined;
	        });
    }
  });
This angular controller has the following functions:-
-
getFilesListqueries ourFileRepositoryvia its REST endpointfiles/and populatesfilesList.files(presented by theng-repeatdirective in the HTML) -
getHrefreturns afile's content hyperlinkfiles/{fileId}(that ultimately callsFileContentController.getContent) -
uploaduploads a new File by firstPOSTing to theFileRepositoryREST endpoints/filesand once createdPUTing the actual content to the Files content REST endpointfiles/{fileId}(that ultimately callsFileContentController.setContent)
Create an Application class
Our simple document list app is now complete. All that remains is to add the usual Spring Boot Application class.
src/main/java/gettingstarted/SpringContentApplication.java
package gettingstarted;

import org.springframework.boot.SpringApplication;
import org.springframework.boot.autoconfigure.SpringBootApplication;

@SpringBootApplication
public class SpringContentApplication {

	public static void main(String[] args) {
		SpringApplication.run(SpringContentApplication.class, args);
	}
}
Build an executable JAR
If you are using Maven, you can run the application using
mvn spring-boot:run. Or you can build the JAR file with
mvn clean package and run the JAR by typing:
java -jar target/gettingstarted-spring-content-fs-0.0.1.jar
And then point your browser at:-
http://localhost:8080
and you should see something like this:-
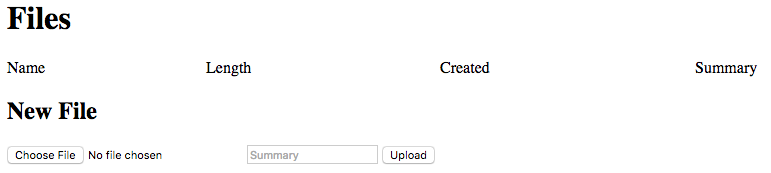
Exercise the application by uploading a range of new files and viewing them. Viewed files will be downloaded and open in the appropriate editor.
Summary
Congratulations! You’ve written a simple application that uses Spring Content to manage streams of binary data - without writing any specific file access code. What's more by just changing the type of the spring-content boot-starter project on the classpath you can switch from a file-based implementation to a different implementation altogether.
Spring Content supports the following implementations:-
-
Spring Content Filesystem; stores content as Files on the Filesystem (as used in this tutorial)
-
Spring Content S3; stores content as Objects in Amazon S3
-
Spring Content JPA; stores content as BLOBs in the database
-
Spring Content MongoDB; stores content as Resources in Mongo's GridFS
Look Forward
In this tutorial we built a simple document list web application using Spring Content.
The majority of the work on the server-side was writing the Spring
controller for handling the Content. Check out our next
getting started guide where we'll use the
companion library Spring Content REST to automatically export these REST
endpoints for our FileContentStore saving ourselves even more work.